https://linuxhint.com/install_fedora_33_raspberry_pi4/ から。
保管のために。著者名にリンク埋め込みあり
How to Install Fedora 33 on Raspberry Pi 4
At the time of this writing, Fedora has official support for ARM devices like the Raspberry Pi 4. So, you can easily install Fedora 33 – the latest release of Fedora Linux distribution on your Raspberry Pi 4.
In this article, I am going to show you how to install Fedora Workstation 33 on the Raspberry Pi 4. So, let’s get started.
Things You Will Need:
To follow this article, you will need the following things:
- A Raspberry Pi 4 single-board computer.
- A USB Type-C power adapter.
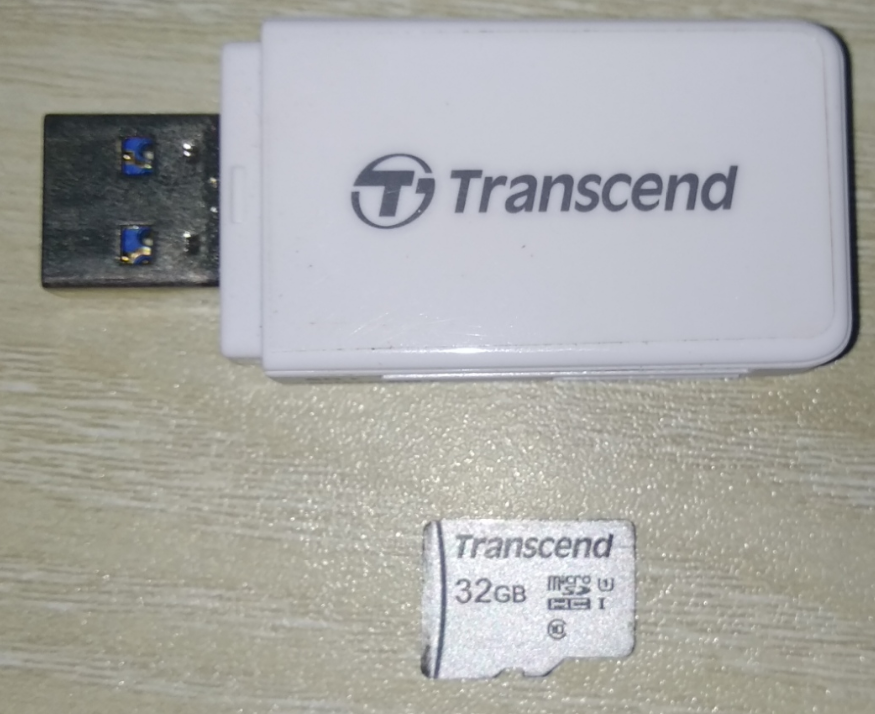
- A 32 GB or higher capacity microSD card.
- A keyboard.
- A mouse.
- A monitor.
- A laptop or a desktop computer for downloading and flashing the Fedora 33 image on the microSD card.
Downloading Fedora 33 ARM Image:
To download the Fedora 33 ARM image, visit the official website of Fedora from your favourite web browser.
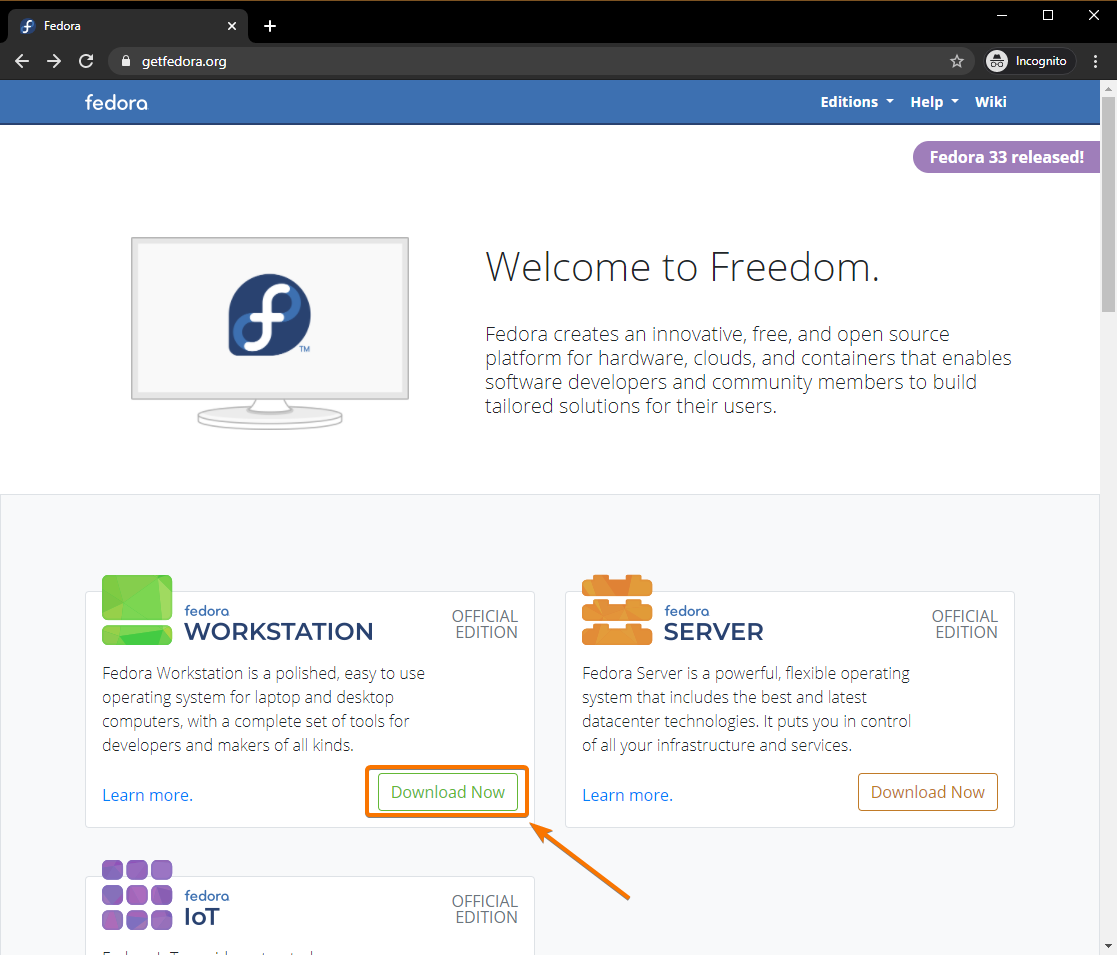
Once the page loads, click on Download Now from the Fedora Workstation section as marked in the screenshot below.
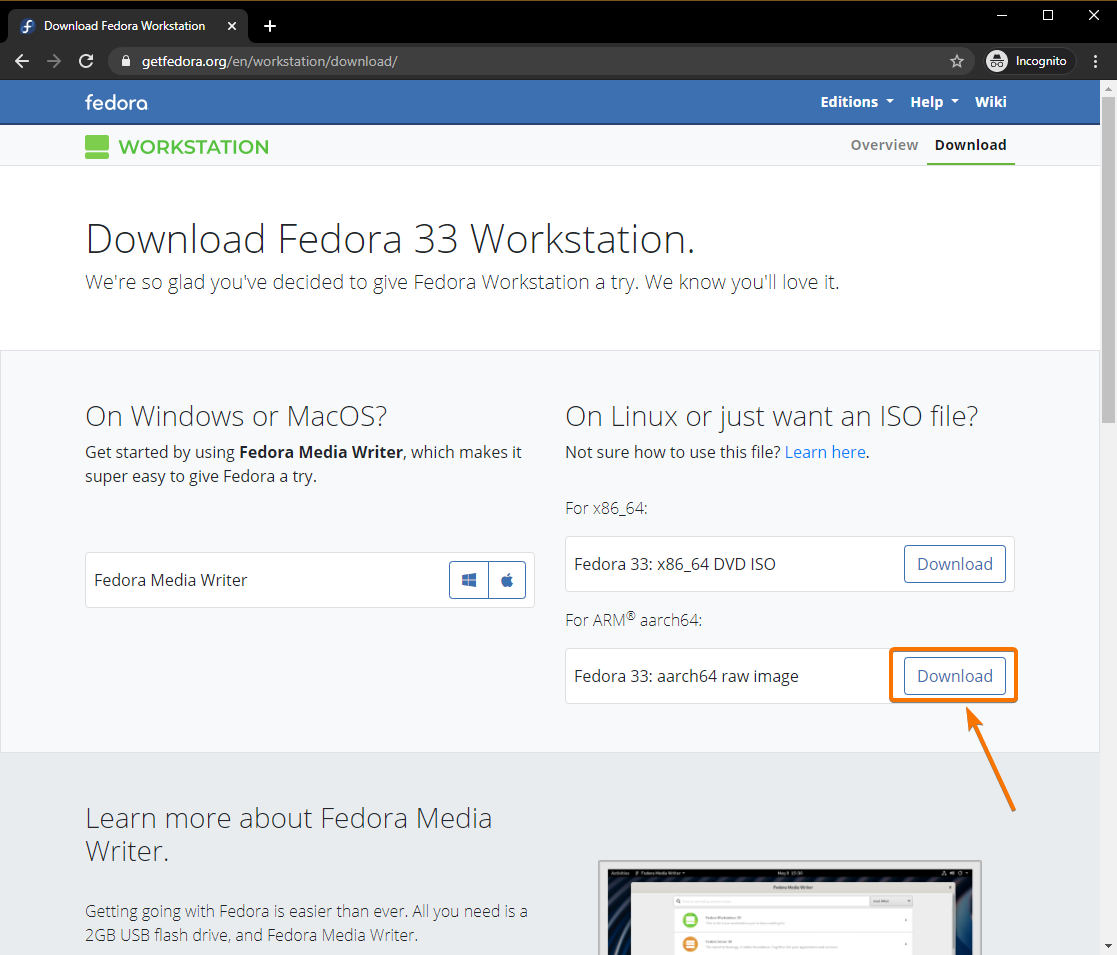
Click on the Download button from the Fedora 33 ARM section as marked in the screenshot below.
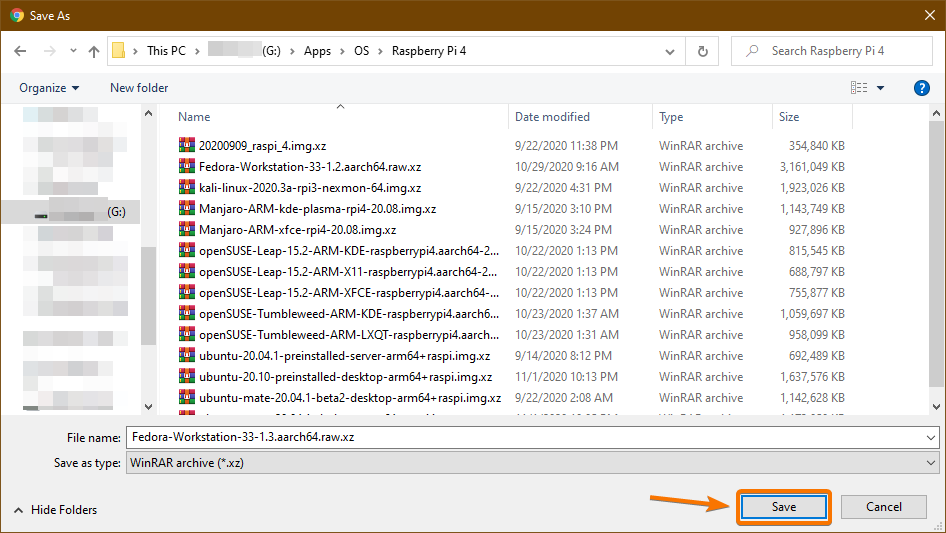
Your browser should prompt you to save the Fedora Workstation 33 ARM image file. Select a directory where you want to save the image file and click on Save.
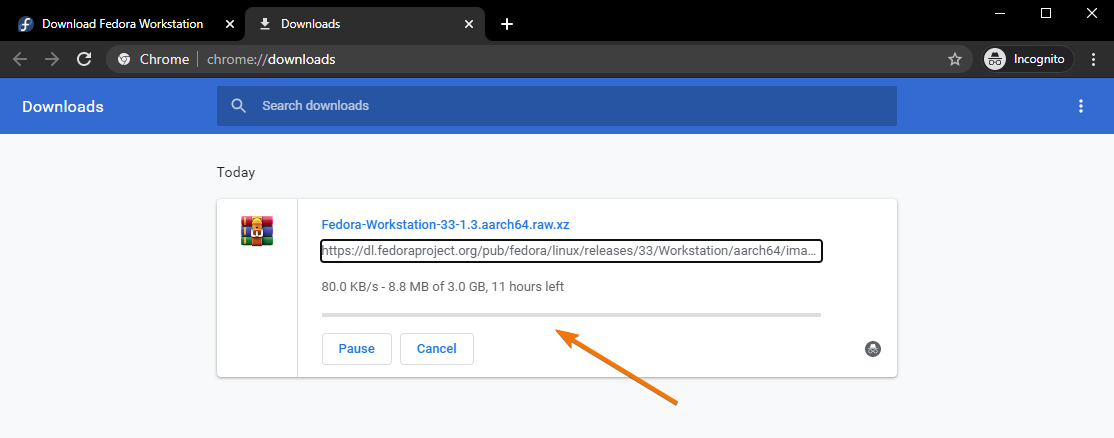
Fedora Workstation 33 ARM image is being downloaded. It will take a while to complete.
Flashing Fedora 33 ARM Image on the MicroSD Card:
To flash the Fedora Workstation 33 ARM image on the microSD card, you can use many programs like Balena Etcher, Raspberry Pi Imager, Fedora Media Writer, and so on. In this article, I am going to use the Raspberry Pi Imager for the demonstration. Feel free to use any tool you like for this purpose.
If you need any assistance on installing the Raspberry Pi Imager, check my article How to Install and Use Raspberry Pi Imager.
First, insert the microSD card into your computer.
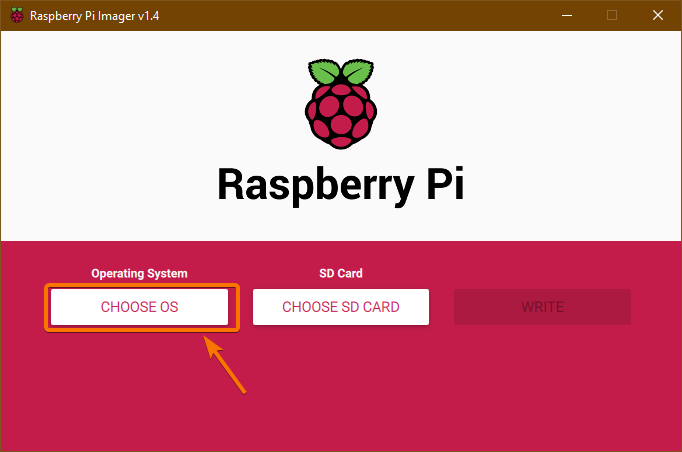
Start the Raspberry Pi Imager app and click on CHOOSE OS.
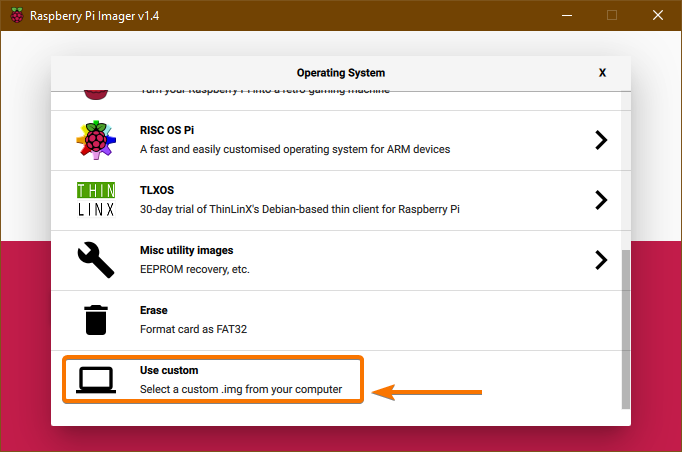
Scroll down a little bit and click on Use custom.
A file picker should be opened. Select the Fedora Workstation 33 ARM image that you just downloaded and click on Open.

Once the operating system image is selected, click on CHOOSE SD CARD.

Click on your microSD card from the list.
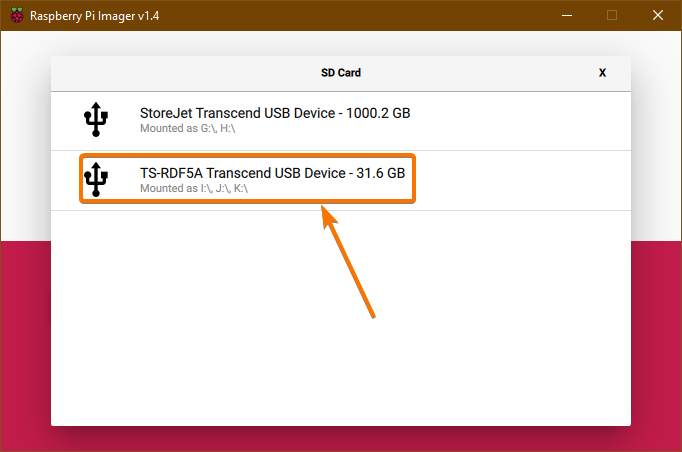
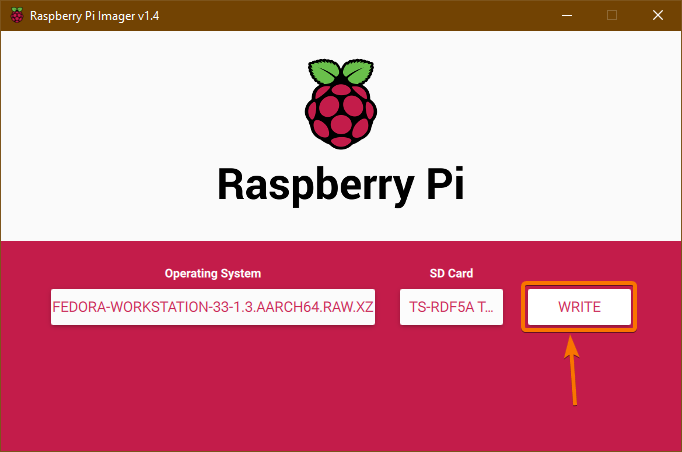
Once the MicroSD card is selected, click on WRITE.
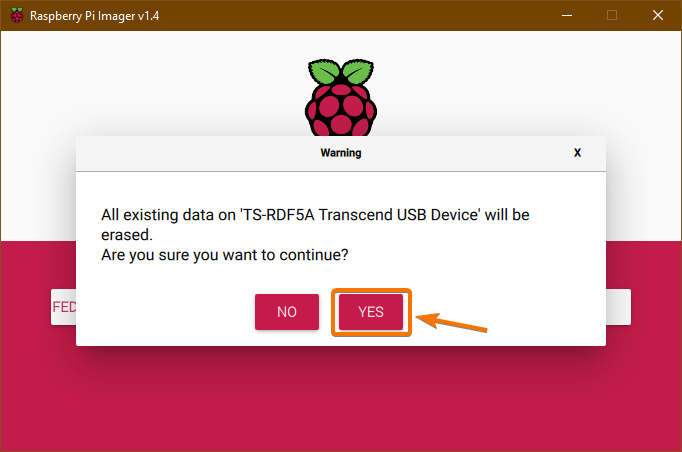
All the existing data on your microSD card will be erased. To confirm the action, click on YES.
The Fedora Workstation 33 ARM image is being written to the microSD card. It may take a while to complete.

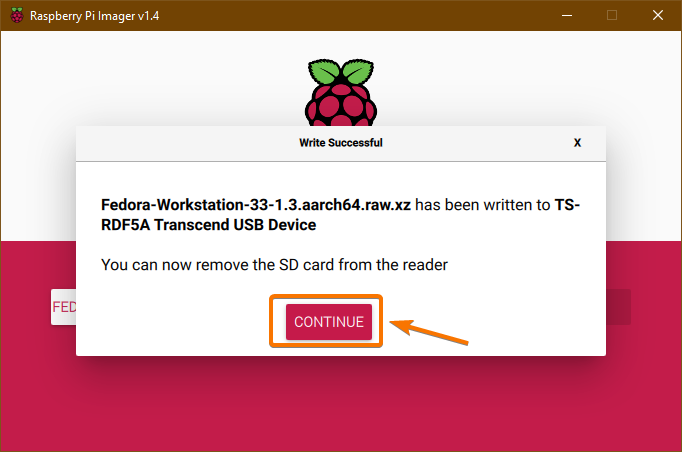
Once the Fedora Workstation 33 ARM image is flashed on to the microSD card, you should see the following Write Successful window. Click on CONTINUE, close Raspberry Pi Imager, and remove the microSD card from your computer.
Booting Fedora 33 on Raspberry Pi 4:
- Insert the microSD card on your Raspberry Pi 4.
- Then, insert the micro HDMI cable of your monitor to the micro HDMI port of the Raspberry Pi 4.
- Also, Insert the keyboard and mouse to the USB 2.0 port of your Raspberry Pi 4.
- Optionally, you can plug in the network cable to the RJ45 Ethernet port of your Raspberry Pi 4.
- Finally, insert the USB Type-C power cable on the Raspberry Pi 4 and power it on.
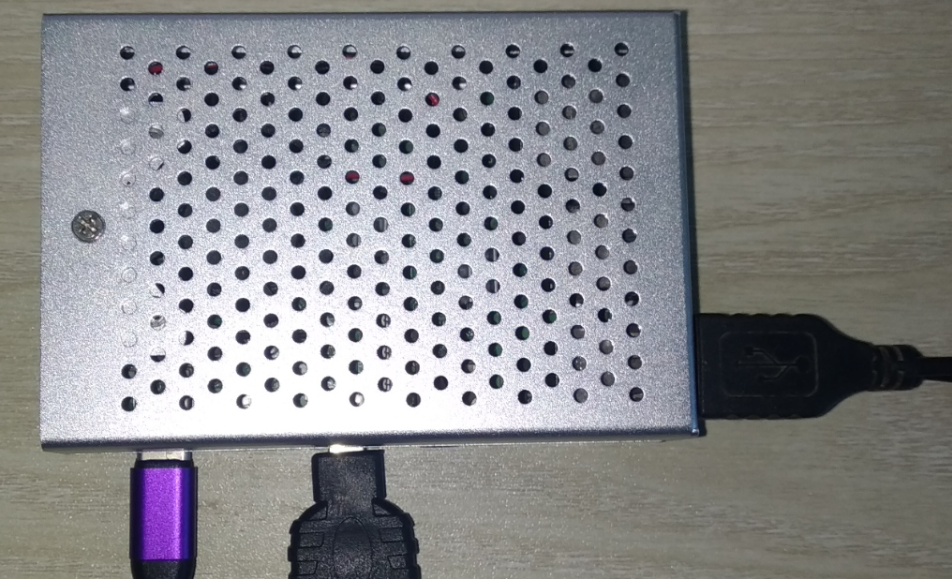
Fedora Workstation 33 is being booted.

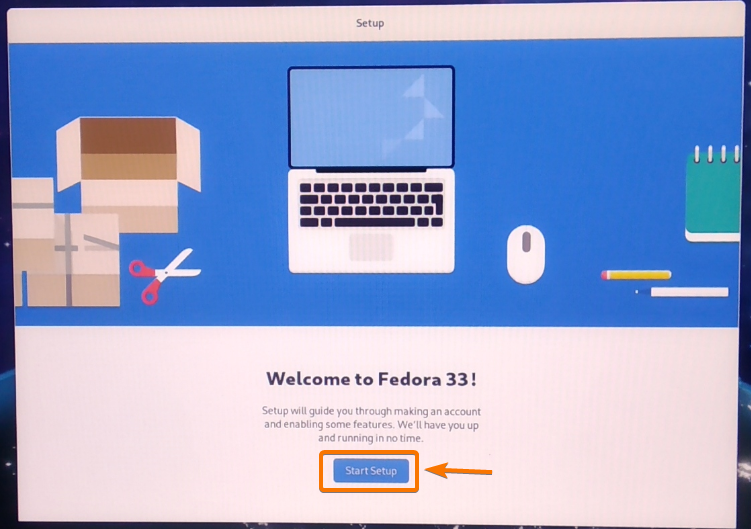
You have to configure Fedora Workstation 33 when it boots for the first time.

To start the configuration wizard, click on Start Setup, as shown in the image below.
You can configure the Wi-Fi network from here. I will use a wired Ethernet network. So, I will click on Skip.
NOTE: I could not connect to the Wi-Fi network. Maybe there are some bugs in the graphical user interface of Fedora Workstation 33. In a later update, the bugs may be fixed. As of now, you should be able to connect to your Wi-Fi network using the Network Manager’s command-line tools. But, I recommend using an Ethernet cable for network connectivity if you don’t strictly need Wi-Fi.

Click on Next.

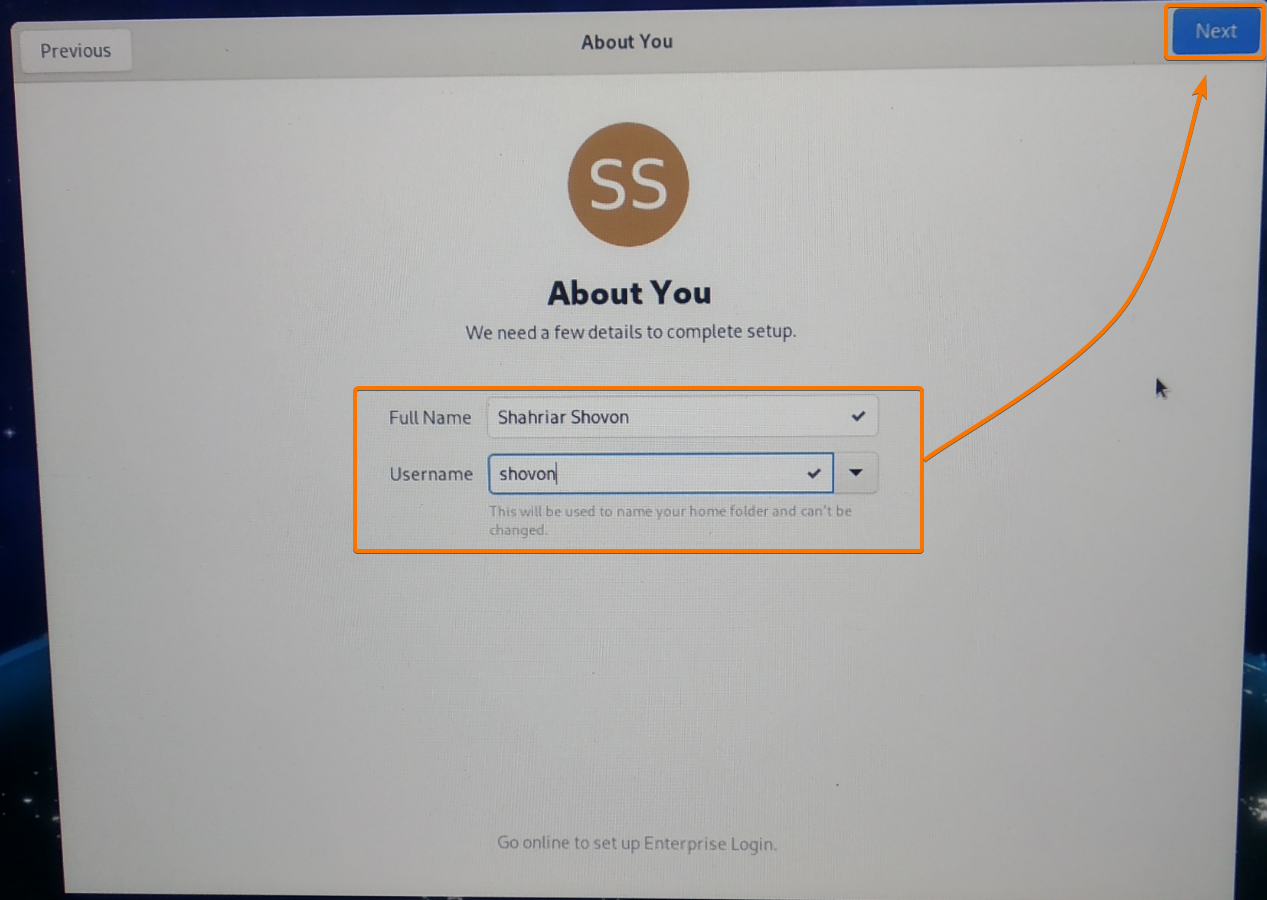
Type in your Full Name and login Username. Once you’re done, click on Next.
Type in a login password and click on Next.

Click on Start Using Fedora.
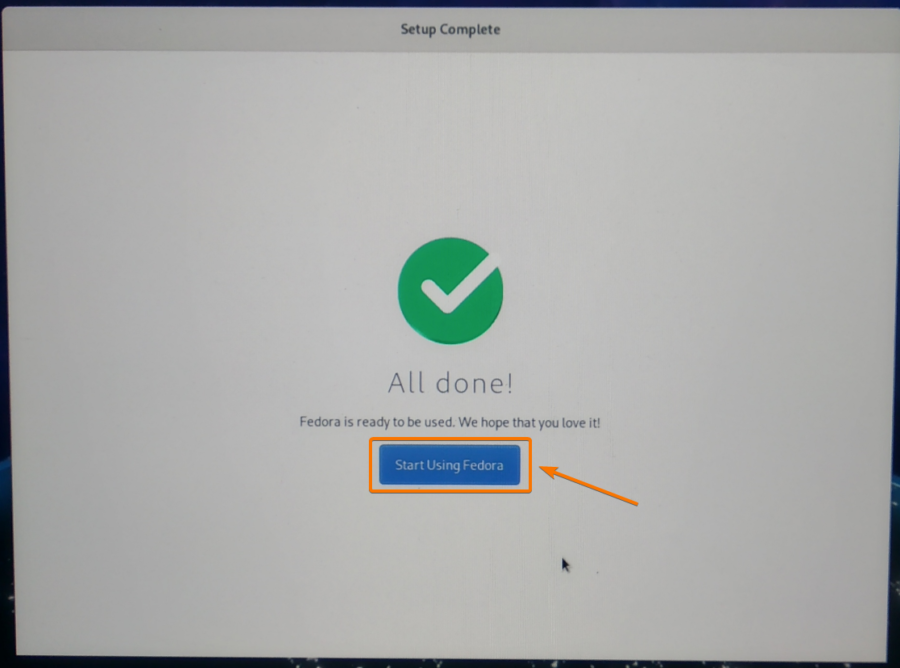
Fedora Workstation 33 should be ready to use.

As you can see, I am using Fedora 33, and it’s using the Linux kernel 5.8.15.
$ uname -r

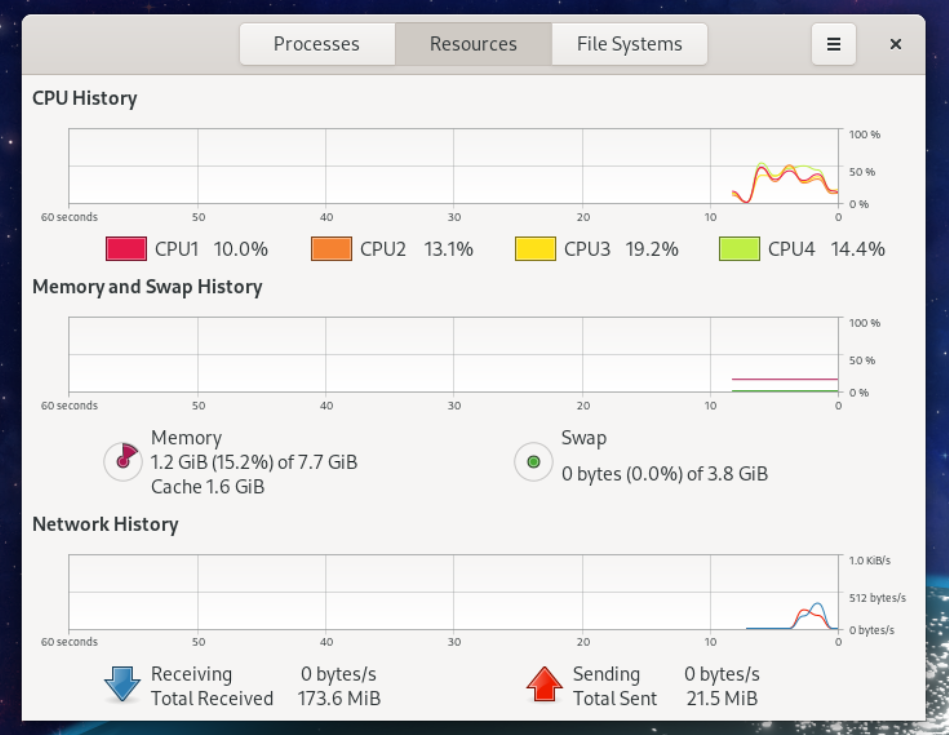
Fedora Workstation 33 uses about 1.2 GB of memory when no extra programs are running.
Removing Black Edges from the Monitor Display:
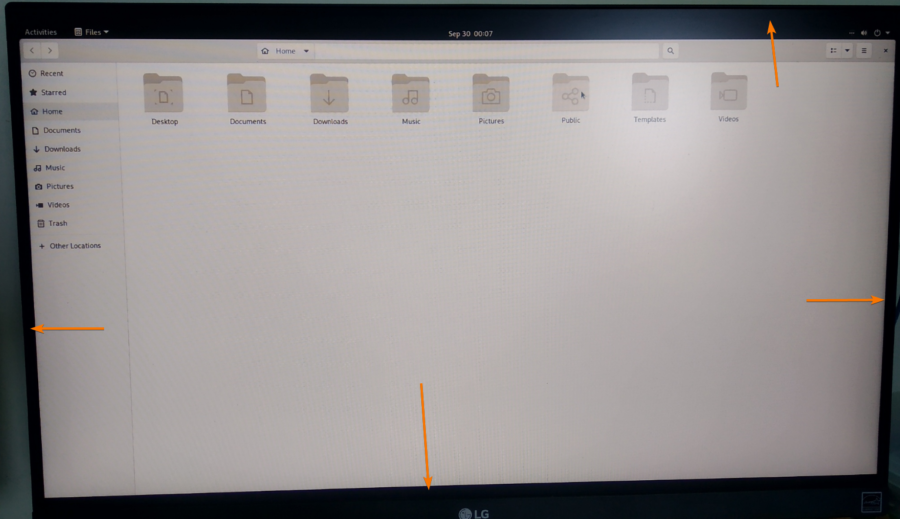
Fedora Workstation 33 may show black borders around your screen. It is because of overscan. In some monitors, overscan leaves exclusion zones around your monitor.
By default, overscan is enabled on Fedora Workstation 33. To fix this problem, all you have to do is disable overscan.
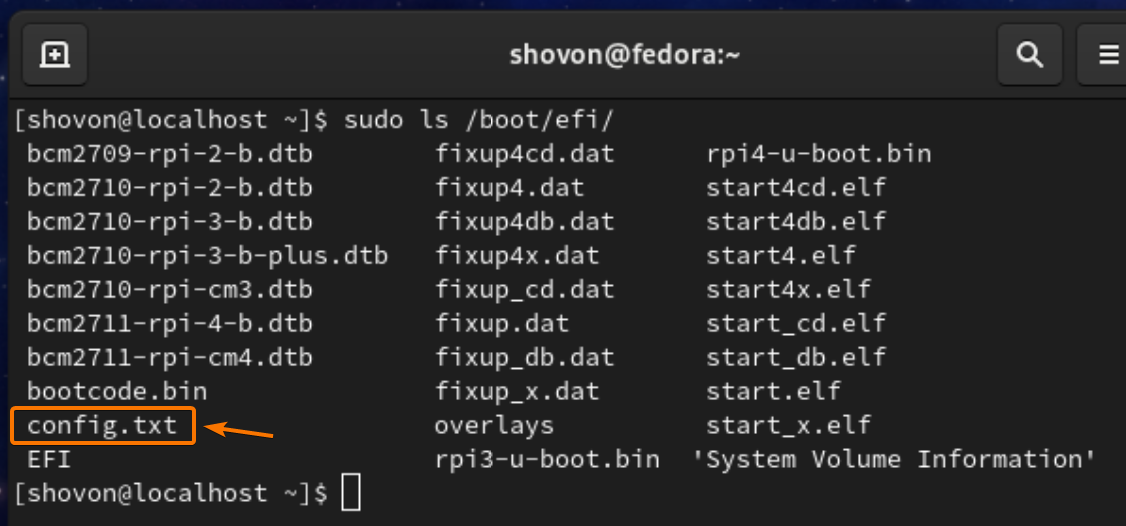
You should find a config.txt file in the /boot/efi/ directory, as you can see in the screenshot below.
To disable overscan, open the /boot/efi/config.txt file with the nano text editor as follows:

The /boot/efi/config.txt file should be opened.
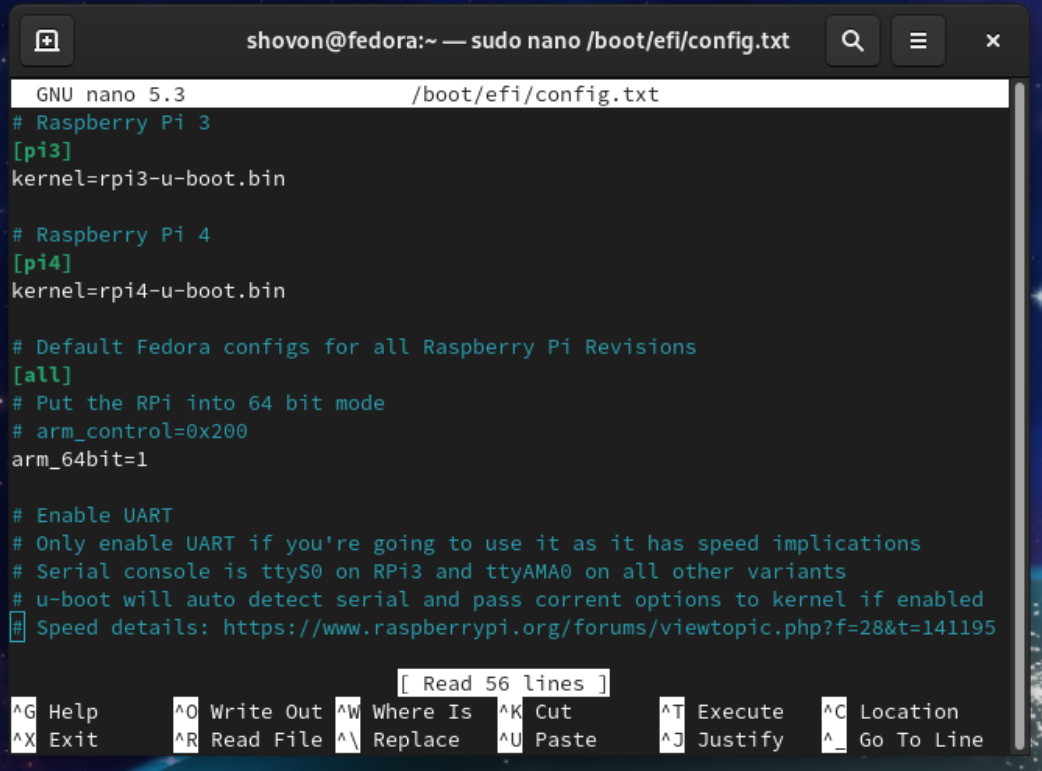
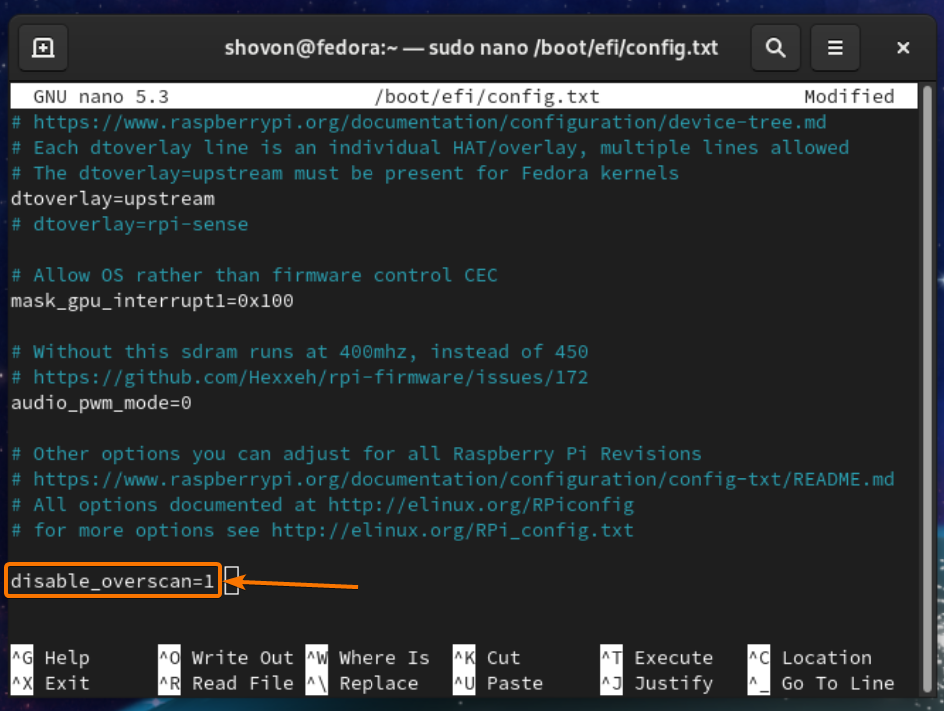
Scroll down to the end of the config.txt file and type in disable_overscan=1, as shown in the screenshot below.
Once you’re done, press <Ctrl> + X followed by Y and <Enter> to save the config.txt file.
For the changes to take effect, reboot your Raspberry Pi 4 with the following command:

Once your Raspberry Pi 4 boots, the black borders should be gone.

Expanding the BTRFS Filesystem:
The default filesystem of Fedora Workstation 33 is BTRFS.
By default, only a portion of the microSD card is used for storing the operating system files and user data. The rest of the disk space is kept unallocated.
As you can see in the screenshot below, only 9.5 GB of disk space (out of 32 GB) from my microSD card is used for the root (/) filesystem.

To expand the file system, you have to expand the partition first.
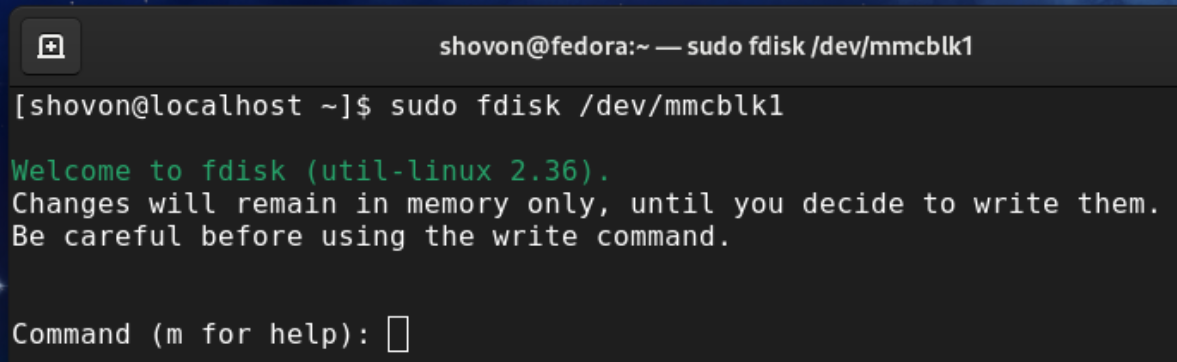
To do that, open the microSD card with the fdisk command-line partitioning tool as follows:

fdisk should open the microSD card.
To list all the existing partitions of the microSD card, press p and then press <Enter>.
As you can see, the 9.4 GB partition is the 3rd partition of the microSD card. You have to remove the 3rd partition and re-create it. Don’t worry. You won’t lose any data.
To delete a partition, press d and press <Enter>.

Type in 3 as the partition number and press <Enter>.

The 3rd partition should be removed.
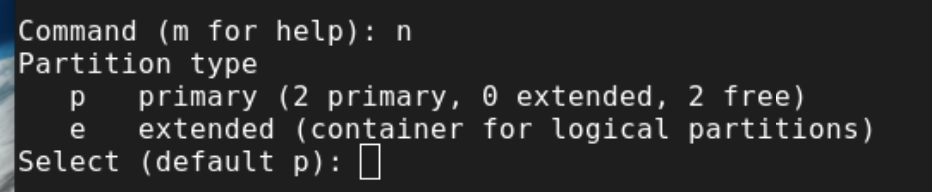
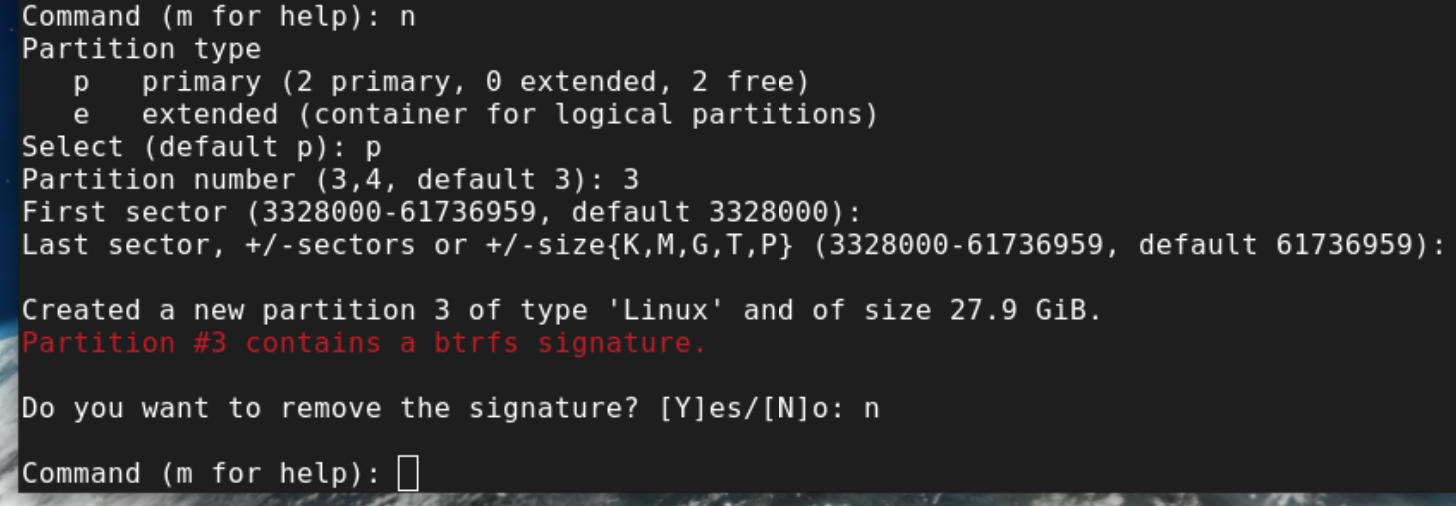
To re-create the 3rd partition, press n and then press <Enter>.

Press p and then press <Enter>.
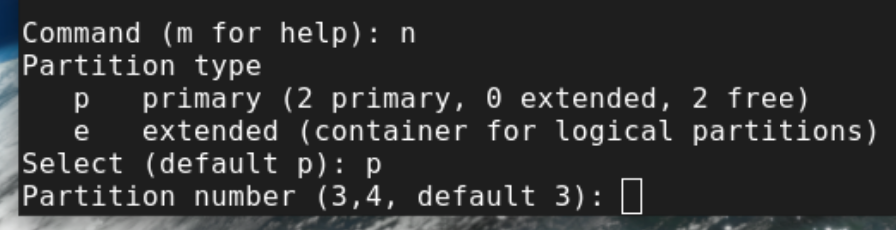
Type in 3 as the partition number and press <Enter>.
Press <Enter> to select the default first sector number.

Press <Enter> to select the default last sector number.
The default last sector number should be the last allocable sector number (from the unallocated space of the microSD card) of the microSD card.

Press n and then press <Enter> to keep the existing partition signature.
NOTE: Be extra careful in this step. If you remove the existing partition signature, you won’t be able to recover your existing files very easily.

The 3rd partition should be recreated.
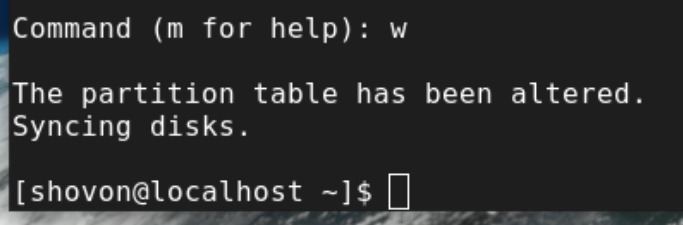
To save the changes, press w and then press <Enter>.
The updated partition table should be written to the microSD card, and the fdisk should be closed.
To resize the BTRFS root (/) filesystem to the max available space of the partition, run the following command:

The BTRFS root (/) filesystem should be resized.

As you can see, the root (/) filesystem is resized to 28 GB (from 9.4 GB).

Conclusion:
In this article, I have shown you how to install Fedora Workstation 33 on Raspberry Pi 4. I have also shown you how to remove the black edges from the monitor and expand the BTRFS root filesystem. This article should help you get started with Fedora Workstation 33 on the Raspberry Pi 4.